Mirror Finishes: How to Polish Your Knife Edge to 8000+ Grit
Goal: achieve a true mirror finish that reflects light cleanly, not just surface shine. This guide explains the controlled process of moving from coarse abrasives to very fine grit so each stage removes marks from the prior stage.
Expect steady work. Skip steps and extra work follows. You will prep, clean, remove oxidation, level with starting grit, then progress through grits, apply compound, and buff until residue clears.
Key risks: overheating, rounding the edge, and removing too much metal. Time and patience matter; rush leads to mistakes. Use repeatable inspection to know when to move forward or back up.
Follow this repeatable process, check reflections under bright light, and watch scratch patterns shrink until near-uniform reflection appears at 8000+ grit.
What a Mirror Finish Really Means for Your Edge and Blade Surface
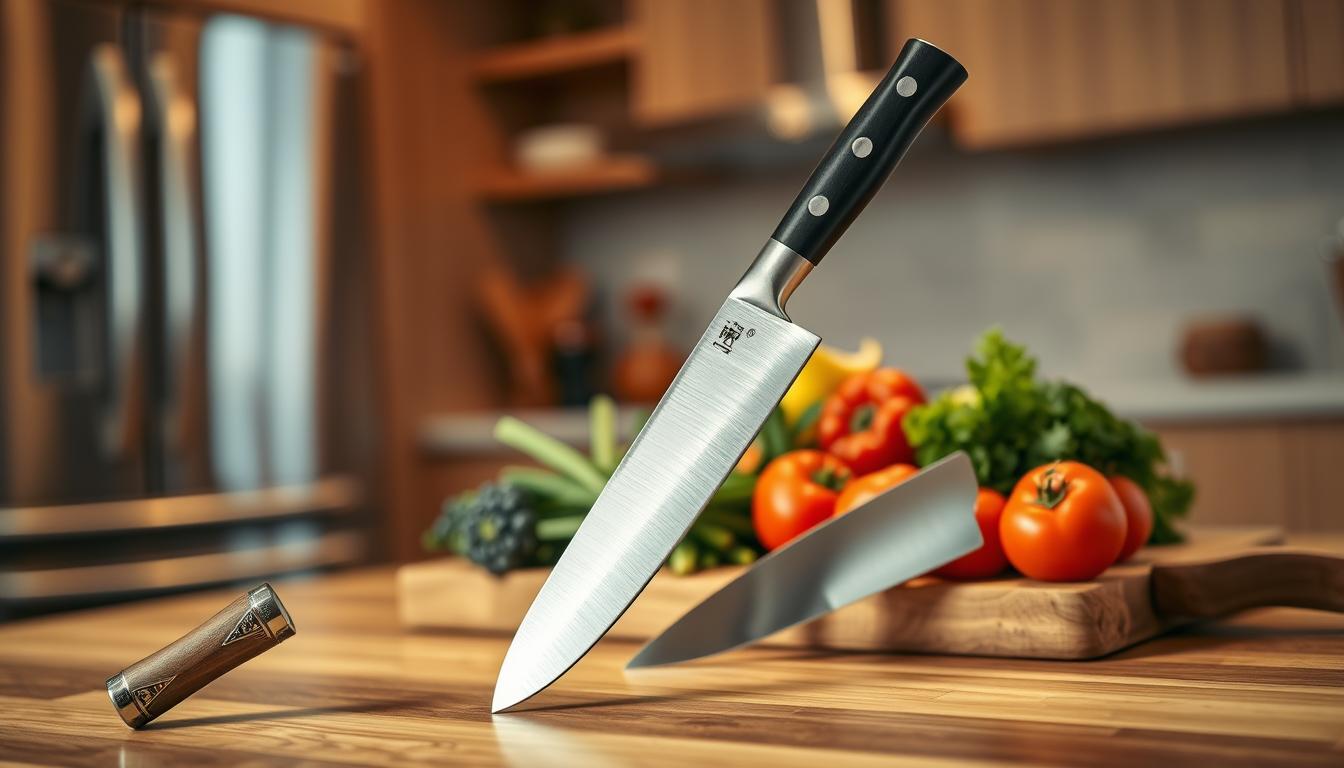
When you aim for a mirror finish, reflections reveal the quality of your work. Under one bright light, a true mirror finish shows a crisp reflection with minimal haze. The blade surface looks uniform and the edge line reads clean instead of cloudy.
Contrast that with a simply shiny result. A glossy blade will still show directional scratches when you tilt it. A real mirror minimizes visible scratch pattern so reflections stay clear from multiple angles.

Scratches form when abrasive particles gouge the metal. Deeper marks take longer to remove, so each grit only removes the previous grit’s pattern. If you skip steps, the next grit cannot hide those deeper lines.
Think of grit progression as a stepwise way to erase earlier marks, not to rebuild the surface. Each pass removes metal, so too much polishing changes bevel geometry and can soften bite compared with aggressive sharpening.
- Use a single bright lamp and tilt the blade to inspect remaining scratches before you move on.
- Decide whether you want mirror only on the bevel or the full blade — that choice saves time and limits metal removal.
- Balance appearance with cutting performance; more shine often means more material removed.
Tools, Materials, and Safety Gear You Need Before You Polish
Gather the right gear before you start so each step flows without interruption. Lay out your tools and materials in sequence so you never handle the blade while hunting for supplies.
Abrasives and stones
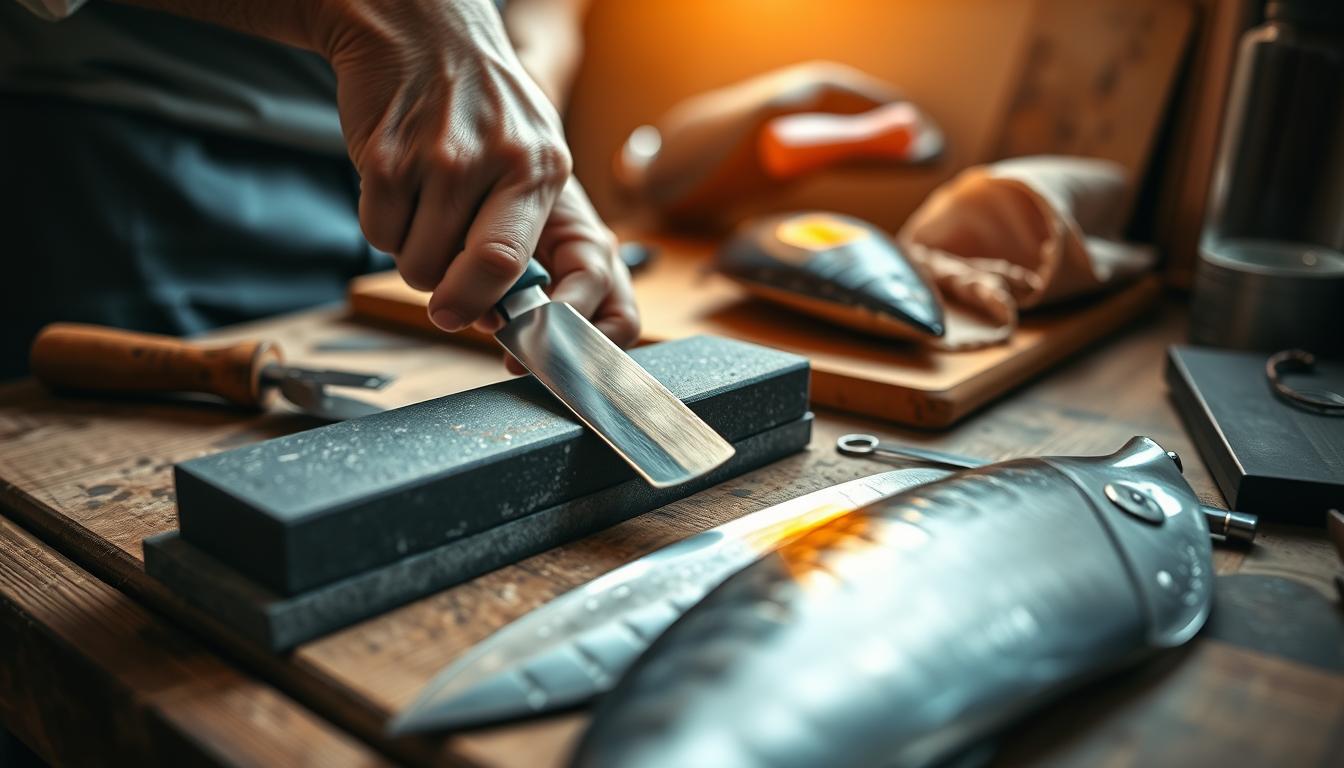
Use wet/dry sandpaper sheets for controlled hand work and select sharpening stone options for repeatable grit progression on the bevel. Start around 400 grit to remove visible defects, then move through 1000–2000 and beyond toward ultra-fine grits and 8000+ polishing media for final refinement.
Compounds, wheels, and rotary tools
Choose a polishing compound designed to refine micro-scratches—compounds cut differently, so they don’t replace skipped abrasive steps. A bench grinder with a buffing wheel clears large surfaces fast, while a handheld rotary tool gives control for small bevels and tight spots.
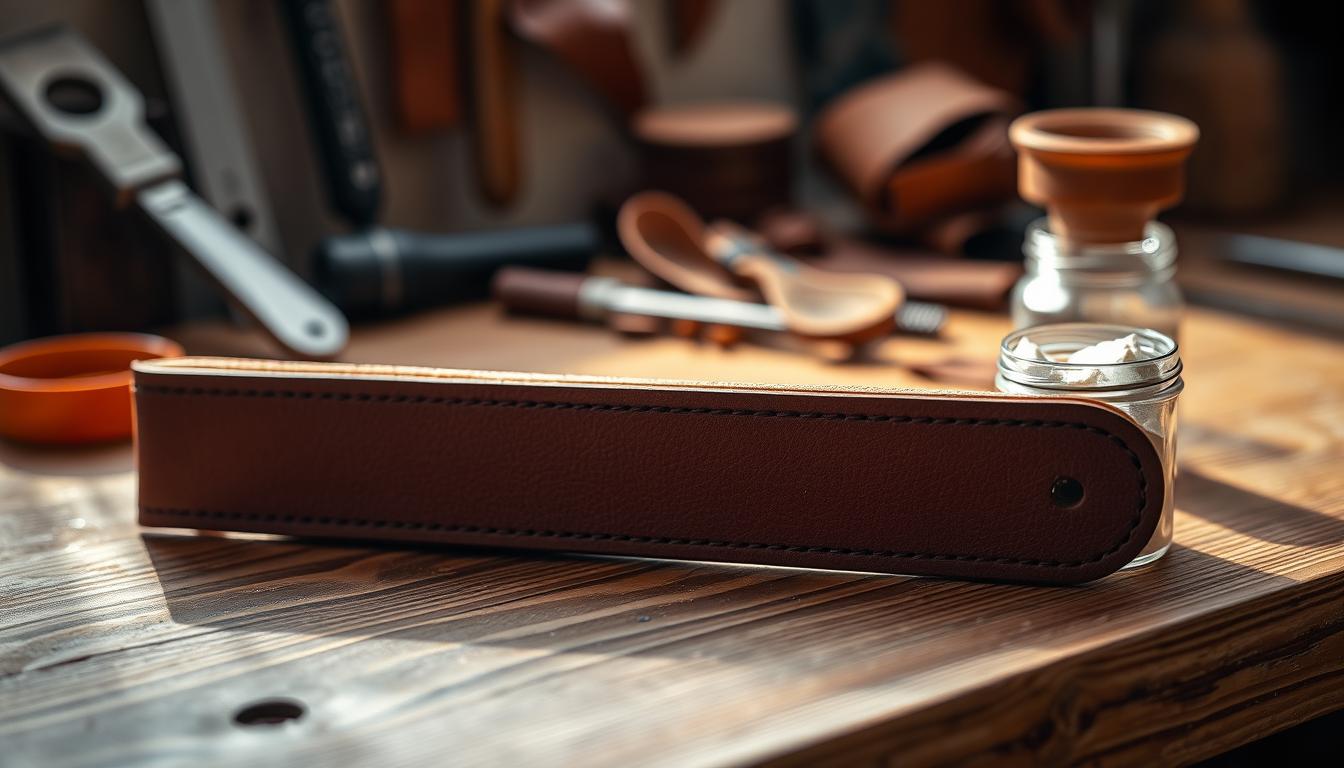
Cloths, leather, and contamination control
Keep separate clean cloths for wipe-downs and dedicate one leather strop for the final pass. Prevent cross-contamination: store coarse grit dust away from fine media and keep compound jars closed between uses.
Safety basics
Wear eye protection, gloves, and a dust mask to guard against airborne metal particles and compound residue. Stage your equipment and safety gear before starting so you never handle the blade while searching for supplies.

- Quality abrasives matter—cheap paper sheds and creates random scratches.
- Use leather strops with light pressure; stropping hones without removing bulk metal.
- Plan your grit progression and layout equipment for safe, efficient work.
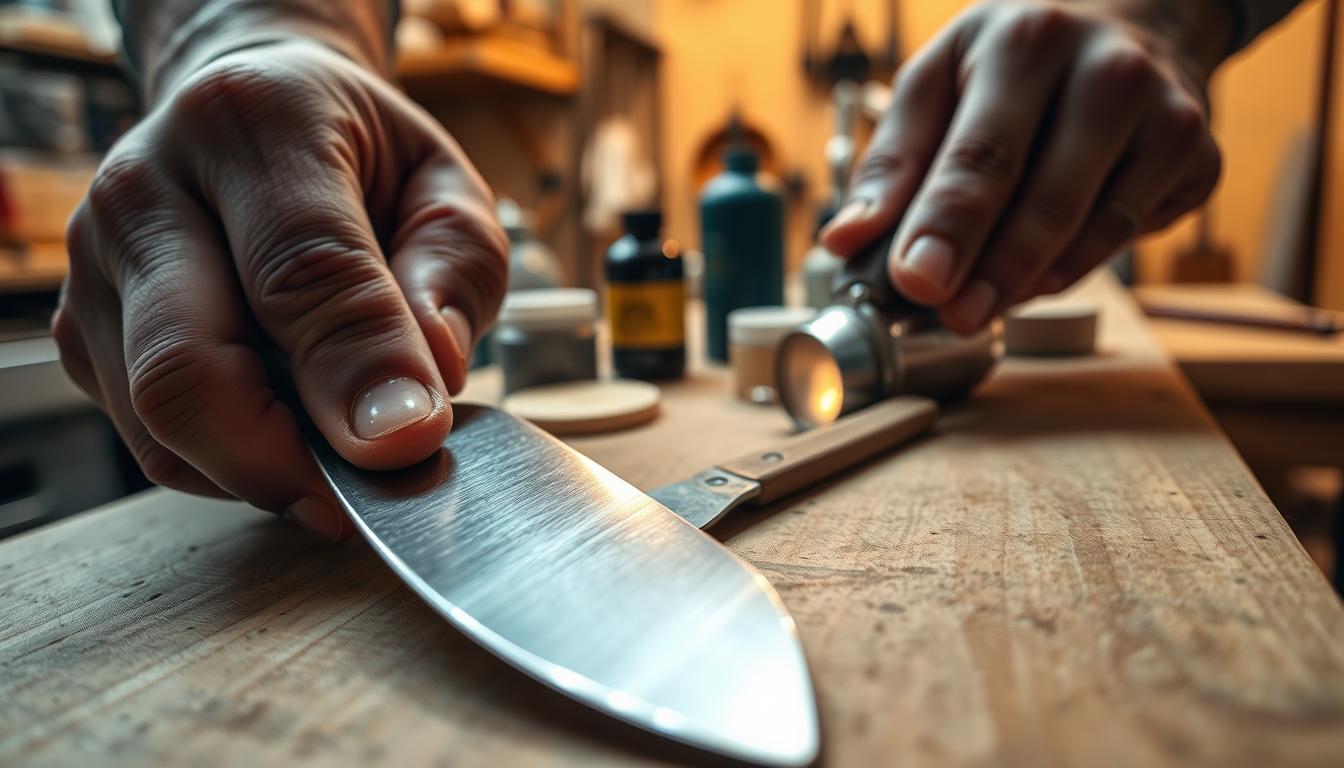
Polishing a Knife Edge Step-by-Step to 8000+ Grit
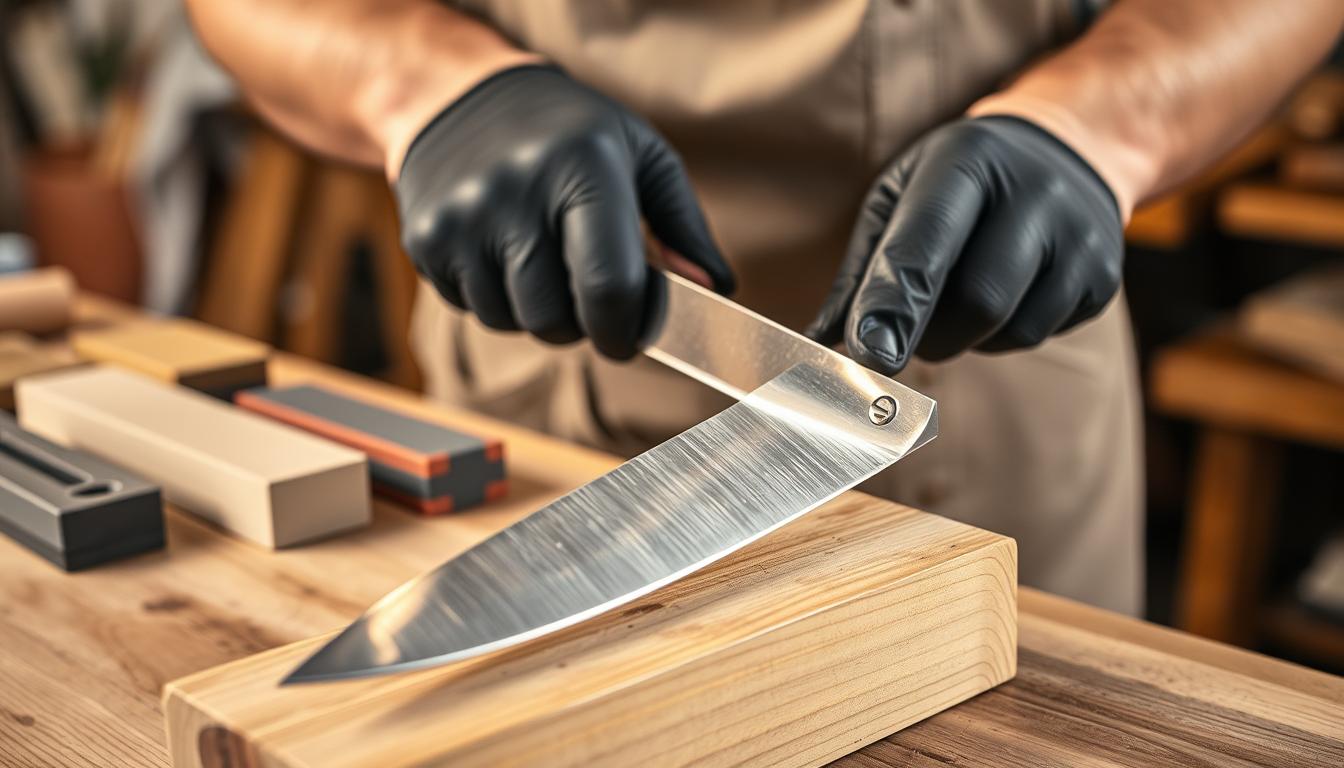
Set yourself up with bright light and a solid bench so you can see scratch direction clearly. Secure the blade and open ventilation before you touch any abrasive or wheel.
Clean the blade thoroughly. Wipe away grease, old polish, and dust so residue does not hide scratches. Remove any rust or oxidation before you chase shine; polishing over pits makes uneven reflections.
Choose a starting grit that fixes the worst mark without creating deeper scratches. Hold a steady angle along the edge blade and use even strokes. Move through finer grits in sequence, replacing coarse scratch patterns with finer ones.
- Inspect under bright light to know when to switch grits.
- If deep scratches persist, use fine grinding with controlled speed (around 1800 rpm for many buffing wheels).
- Apply small amounts of polishing compound to cloth or felt and use low pressure to cut cleanly.
- Make steady, light passes on the wheel and finish on a clean section for maximum gloss.
Rinse, wipe, and dry thoroughly to remove black residue. Re-check the surface under lamp light to confirm uniform clarity from heel to tip.
Troubleshooting for a True Mirror Edge Finish
When reflections look cloudy, the fix is usually simpler than redoing every step. Wipe the blade clean and inspect under bright light. That separates leftover residue from real micro-scratches.
If haze is from residue, the fastest way is to switch to a clean wheel or a fresh section and re-polish with light pressure. Remove any black compound film before you judge the result.
When scratches won’t disappear, back up one grit and rebuild forward. Treat persistent marks as a grit-progression issue; controlled grinding then careful polishing removes deeper lines.
Swirl marks come from contaminated wheels or too much compound. Keep compounds separate, clean your wheel, and limit the amount applied to avoid new patterns.
To avoid blade damage, control speed and use light passes while buffing. Keep your angle steady—you can’t put metal back once you remove it. Slow, clean passes protect geometry and quality.
- Diagnose: haze vs. scratch, then pick the smallest fix.
- Fix: clean wheel, less pressure, fresh section for polish.
- Protect: mask contrast areas on two-tone knives and inspect often.
Conclusion
Finish strong by confirming each grit truly erased the previous scratches before you progress.
You get a true mirror by learning to move finer through abrasives and by making checks under bright light. This process keeps geometry intact while improving appearance and cutting performance.
Protect results with two steady habits: clean between stages, and use light, controlled passes to avoid heat and contamination. After you polish knife faces and blade flats, wipe clean, dry fully, then apply a light oil to slow oxidation.
Choose the finish that fits how you use your knives. Practice this polishing process on a less-valuable tool first so you master pressure, inspection, and control before moving to prized pieces.