Testing Your Sharpness: The Paper Test, Tomato Test, and Hair Test
Quick home checks tell you if a blade is ready for work or needs attention. Good Housekeeping begins with a paper-slicing check and then moves to real cooking tasks like slicing tomatoes and onions. ATK suggests a simple approach and says to hone between full sharpening sessions.
In this section you’ll get a short preview of three common at-home checks: the paper test, the tomato test, and the hair test. Each is fast, and you can pick one that fits your comfort and skill level.
Know what you’re measuring: these quick checks evaluate the blade’s performance, not the brand. Results depend on your technique, lighting, paper type, and a steady hand.
These simple trials tie directly to cooking outcomes you care about: cleaner slices, less squashing, and safer control. You’ll also learn how to read results and decide whether to hone or sharpen next.
Safety note: always keep your hands clear of the edge and use controlled, low-force movements when you try any test.
Why sharpness testing matters for your kitchen knife
You want consistent, repeatable cuts—so knowing edge health before you start pays off. A keen edge reduces the force you apply and keeps the blade tracking straight through food.
Performance, not polish: Sharpness is a real performance feature. A sharp blade slices with less pressure, improving stability and lowering hand fatigue during long prep sessions.
Precision and control: A good edge lets you do thin slices and clean dices. That control matters whether you rock, push-cut, or make delicate chef-style cuts.

- Everyday tasks—onions, herbs, garlic—cut cleanly with a sharp blade. Dull tools crush and bruise food.
- Safety risk: dull blades make you push harder. Food can slip, especially on chicken skin or dense produce like potatoes, putting fingertips at risk.
- Quick checks prevent mid-recipe surprises and help you decide whether to hone now or schedule a full sharpening session.
Set a practical goal: aim for consistent kitchen results that match your cooking needs, not stunt-level sharpness.
What you need before you start testing your blade
Before you try any sharpness checks, set up a safe, steady workspace so the edge and your movements are the only variables.
Quick safety check: stable cutting surface, dry hands, and a clear work area
Place a stable board on a flat counter and remove clutter. Good lighting helps you see nicks or rust on the blade.
Keep your hands dry so the handle won’t slip. A secure grip and proper pinch grip fit matter for control and knuckle clearance.
Clear bowls, towels, and phones away. When your attention stays on the edge and the direction of force, you reduce accidents.
What “sharp” can mean in practice: factory edge vs. maintained edge
A factory edge is how the blade arrived: often keen and ready to use right out of the box. A maintained edge is what you get after regular honing and occasional sharpening over time.
With brief, regular care a maintained edge can outperform many factory edges. Inspect the blade for chips, rust spots, or unevenness before any checks.
- Set a baseline for your own use: aim for consistent performance from heel to tip.
- Check handle comfort and material—grip affects how the blade tracks through food.
- If you spot visual defects, fix them first; they skew results and increase risk.

Kitchen knife testing methods you can do at home
Start by choosing a low-risk method that fits your experience and the kind of blades you own. Simple checks save time and avoid damage. Good Housekeeping recommends paper first, then real-food cuts. ATK adds that a honing steel is a useful touch-up between full sharpening sessions.
How to choose the right test for your blade type and comfort level
If you’re new, begin with paper and tomatoes. These are low-risk ways to gauge sharpness and edge feel. Thin Japanese-style blades may slice effortlessly but can chip. Heavier Western blades handle dense food better but may need more force to feel sharp.
When to stop testing and sharpen instead
If the blade repeatedly snags, tears, or needs extra force, stop. Don’t keep running tests that damage the edge. Your next step should be honing or a proper sharpen session, not more trials.
- Main categories: low-risk media (paper) vs real-food (tomato, onion).
- Beginner tip: pick easier tests first and graduate as confidence grows.
- Decision rule: repeated failures mean sharpen now, not later.
- Watch the trap: one good slice doesn’t prove consistent performance.
The paper test for a knife-sharp edge
A quick paper slice can reveal whether an edge is ready for prep or needs attention. This is the low-effort check reviewers like Good Housekeeping and ATK run first before moving to real food.
How to set up the paper test for consistent results
Standardize materials: use the same printer paper or newsprint every time. Hold the sheet the same way and keep the blade path steady.
What a clean slice tells you about your edge and angle
A single, clean cut means the edge apex is aligned and the angle bites immediately. That predicts smooth, low-force cuts in the cook line.
Common failures: snagging, tearing, and why they happen
Snags often point to micro-chips or a rolled edge. Tearing usually means an uneven bevel or too much force.
How lab reviewers use paper as a first screen
- Safe setup: support paper, keep your non-cutting hand well away, and move the blade away from you.
- Check the side and grain of thin paper if results vary—paper can skew the outcome.
- Quick pass/fail: if you can’t start a cut without forcing it, stop and hone or sharpen rather than repeat the test.
The tomato test for real-world cutting performance
A ripe tomato is unforgiving: its thin skin and soft flesh expose a poor edge right away. This makes tomatoes one of the most honest home checks for everyday cutting performance.
How to slice without squishing the flesh or tearing skin
Stabilize the tomato on a flat surface and hold it gently. Start with a light forward draw and let the blade bite the skin instead of pushing down.
What tomato performance reveals about finish and smoothness
If slices come out intact with no torn skin, your edge has an immediate bite and a smooth finish. Tears or pulping point to a rolled or coarse bevel that grabs the skin.
What top lab and kitchen evaluators look for
- Intact skin edge-to-edge with minimal juice pooling.
- Even slice thickness for presentation and precision.
- A blade that “glides through” rather than rips, as lab notes often state for the best chef models.
The hair test and when you should avoid it
The hair test looks impressive, but it is often more theatrical than useful. It can show that an edge will catch a strand, yet that catch does not always predict real-world sharpness for daily prep.
Why the hair test is controversial and easy to misread
Hair thickness and direction vary a lot between people. A blade can nibble a long hair yet still fail to slice a tomato cleanly.
Some edges are “toothy” and grab hair but tear soft food. That gives a false sense of success.
Safer alternatives that still reveal sharpness
Bringing an edge near your hands or face raises risk for little gain.
- Paper shows clean slicing behavior quickly.
- Tomato reveals skin bite and finish.
- Onions test real prep feel and seam-starting ability.
Practical tip: if the edge won’t start on onion skin without extra force, hone or sharpen. For most home cooks the hair test is optional and usually unnecessary when you use these safer, reliable tests.
How to interpret your test results and decide what to do next
Interpreting simple slices and snags helps you pick the right fix without guesswork. Read each outcome as a clue about the blade and how it will perform in real prep.
If paper passes but tomato skin fails
If your paper cut looks clean but the tomato skins tear, the edge may be toothy or have a fatigued apex. That means the edge bites low-resistance media but fails to start on slippery skin.
If the blade wedges in dense food
Wedging often ties to geometry and angle, not raw sharpness. A too-wide bevel or blunt secondary angle can split dense produce and stick even when the tip feels keen.
If the tip is sharp but the heel is dull
Uneven edges make rocking and chopping awkward. The heel does most board contact; a weak heel forces you to change motion and add pressure, which slows prep and increases slip risk.
When honing is enough — and when to sharpen
Hone when the edge is rolled but intact; a steel realigns the bevel quickly and saves time. Sharpen when you see chips, persistent snagging, or repeated failures across tests — sharpening removes metal and resets the angle.
Save time and stay safe: if you must force a cut, stop and fix the edge. Forcing a dull blade is how accidents happen and how your work gets harder.
What makes a chef knife feel sharp in your hand
The right balance of angle, geometry, and handle design defines sharpness as you use a tool. You notice it in the first slice: how the blade bites, how it glides, and how your hand moves.
Edge angle basics and why many tested knives land around the mid-teens
Narrower angles feel sharper. Lab work shows many top models sit near 13–16° per side (ATK). For example, Shun measured about 13° while Wüsthof and Victorinox recorded roughly 15.8° and 20°, respectively.
Blade geometry: spine thickness, rigidity, and wedging vs. glide
Spine thickness changes the way a blade drives through food. Wüsthof’s thicker spine (≈2.60 mm) adds power and resists bending, while Shun’s thinner spine (≈1.92 mm) lets the steel glide but feel more delicate.
Steel and hardness
Steel hardness affects edge retention and chip risk. Harder alloys hold a keen edge longer but can chip if you hit hard material. Softer steels trade retention for toughness.
- Finish and QC: a smooth grind and good factory edges often mean better tomato and onion performance right away.
- Handle fit: a handle that suits your hand steadies your motion and boosts precision over time.
- Knuckle clearance: taller heels keep fingers off the board and improve confidence when you work.
How we evaluated the chef knives tested in top reviews
To judge models fairly, we matched precise lab readouts with common prep tasks and feel checks so you can compare scores to real use.
Lab measures you’ll see
BESS scores show sharpness in a number: lower is keener. OutdoorGearLab logged Wüsthof at 140 BESS, Shun at 153, and Victorinox at 213—numbers that help you spot razor-range edges.
HRC indicates steel hardness and edge retention. Measured values were about Wüsthof 54, Shun 51, and Victorinox 54. Higher HRC can mean longer life but more chip risk.
We also recorded bevel angle (Wüsthof ≈15.75°). Angle helps but factory finish and grind quality often change how an edge actually feels on food.
Kitchen tasks and ergonomics
Reviewers ran real tasks: tomatoes for skin bite, onions and garlic for precision, herbs for clean cuts, squash for power, and chicken breakdown for durability.
- Ergonomics: weight and balance for control.
- Pinch-grip feel and handle material performance when hands were wet.
- Consistency across the blade from heel to tip.
Roundup logic: use lab metrics plus these tasks and feel checks to understand why certain models win best overall, upgrade, or value in our comparisons.
Top upgrade pick for sharpness and looks: Shun Classic 8″ chef knife
If you want a premium upgrade that pairs razor-like performance with a refined finish, consider the Shun Classic 8-inch model. It blends acute geometry with a luxury handle so you get precise control and a polished aesthetic.
Why it stands out:
Very sharp out of the box and strong edge retention
OutdoorGearLab recorded a factory sharpness around 153 BESS and a measured bevel near 13°. That geometry gives a true razor-range bite for thin slicing and clean paper and tomato results.
What to watch for
The blade’s spine is about 1.92 mm, which helps its glide but also raises a real chipping risk if you hit hard materials or bone. Reviewers flagged brittleness under heavy strike.
Who it’s best for
This model suits cooks who value precision cuts and a premium feel. The Pakkawood handle offers a warm, stable grip for extended prep work.
- Performance note: expect easy starts, smooth draw cuts, and fine precision for thin slices.
- Edge life: higher-performance steel and a quality finish help the blade hold sharpness longer between sharpenings.
- Price/value: this is a higher-tier choice aimed at users willing to pay more for fit, finish, and razor-like performance.
Best overall workhorse: Wüsthof Classic 8-inch chef’s knife
The Wüsthof Classic earns its reputation as a dependable workhorse. OutdoorGearLab logged a factory sharpness around 140 BESS and a measured bevel near 15.75°, paired with about 54 HRC steel and a thick 2.60 mm spine.
What published testing shows
Strong out-of-box sharpness and durable forged construction make this chef knife a go-to for heavy use. The measured angle and hardness support long edge life and toughness.
How it behaves in your tests
You’ll see steady paper cuts, clean tomato slices, and reliable performance on tougher food where lighter tools can stall. The thicker spine keeps the blade tracking straight under pressure.
Trade-offs and fit check
Weight and full-bolster feel give a grounded, balanced cut but can tire smaller hands during long sessions. If you prefer a solid, stable hand-feel and cook often, that extra weight is a benefit.
- Workhorse pick: consistent across many prep styles.
- Lab backing: 140 BESS, 15.75° bevel, 54 HRC.
- Consider: try the handle before you buy if hand size is a concern.
Best value for most home cooks: Victorinox Fibrox/Swiss Classic 8-inch chef knives
If you want dependable performance without a big spend, this model is a smart place to start.
Why it wins on price-to-performance: reviewers from ATK and others have long praised the Fibrox Pro and Swiss Classic for solid build, easy maintenance, and durable material that stands up to daily use.
What you’ll notice in testing
The blade usually handles paper and tomatoes reliably, making routine checks quick and useful. Expect less laser-like precision than premium models because one review measured a wider bevel angle (about 20°), which softens the bite on very fine slices.
Handle and use notes
Handle material is grippy and utilitarian, built to work well when your hands get wet or greasy. That practical feel reduces slips and keeps you moving through prep.
- Price advantage: strong performance under $75—ATK’s long-time top pick in value.
- Edge life: easy to sharpen and maintain at home.
- Blade profile: wider shape suits larger produce and board work but can feel less delicate for ultra-thin cuts.
Who should pick it? If you are new, cook frequently, or want a hardworking tool you won’t baby, this model gives sensible balance between price and performance for everyday use.
Best tight-budget option: Mercer Culinary Millennia 8-Inch chef’s knife
When you need a functional tool that won’t break the bank, entry-level chef models can be smart choices. The Mercer Culinary Millennia is one of those practical options that balances price and daily use.
Where it keeps up: For basic slicing and chopping, this model can perform like pricier knives if the factory edge is decent. You’ll get clean paper slices and acceptable tomato cuts for most meal prep.
Where it feels more basic
The textured plastic handle gives grip, but many users find it less comfortable over long prep time. Finish details and fit reflect the lower price, so expect utilitarian construction rather than refined touches.
What to check in your home tests
Focus on edge consistency from tip to heel. Run the paper test along sections of the blade, then try repeat tomato slices from heel to tip. Look for any soft spots or uneven starts.
- Why consistency matters: uneven sharpness makes rocking and chopping unpredictable and pushes you to apply extra force.
- Ownership expectation: plan to sharpen a bit sooner than with premium models, but you’ll still get strong value for the price.
- Best use: daily prep and first-time cooks who need reliable, affordable options.
Best for precision-focused cooks: Mac Professional Series 8″ (hollow edge/dimples)
When thin, even slices matter most, the Mac Professional 8-inch stands out for its light touch and precision geometry. You’ll notice how the thin, low-weight blade lets you guide cuts with small wrist motions rather than brute force.
Why skilled users like it
The design favors ultra-fine slicing and control. The hollow-edge dimples reduce sticking and help food release during each pass. That makes delicate work like tomatoes and herbs smoother and more consistent.
Fit and feel for precision work
The shorter handle encourages a close pinch grip that many pros prefer for detail cutting. If your hands are smaller, this balance gives strong control and quick feedback from the blade.
Confirm fit before you commit. A handle that suits your grip makes thin, repeated cuts faster and less fatiguing.
Performance you’ll see in simple checks
- Clean starts on tomato skin and smooth paper slicing when the edge is properly maintained.
- Thin geometry and lighter weight favor draw cuts and finesse over heavy chopping.
- Works best as part of a set where you pair it with a sturdier workhorse for tougher jobs.
Care and long-term notes
Real-world caution: the blade is prone to rust spots if left wet. Dry thoroughly after washing and store in a dry place to keep the steel performing well.
If your cooking style centers on thin slicing and precision, this model rewards careful care with agile, reliable cutting performance.
How to choose the best 8-inch chef knife for your kitchen and budget
Finding the best 8-inch chef means balancing weight, blade geometry, and price against your daily cooking habits. Start by thinking about how you cut, the foods you handle, and how much care you’ll give the tool.
Western vs. Japanese style: weight, thickness, and cutting way
Western blades are usually heavier and thicker. That adds durability and helps with rocking and heavy prep. Japanese blades tend to be lighter and thinner for precise push and draw cuts. Choose the style that fits how you cook and how careful you are with maintenance.
Handle materials and comfort in real use
Handle choice affects grip and safety. Wood or wood composites feel warm and premium. Polymer handles give excellent wet grip. Metal handles look sleek but can be slippery. Try a handle before you buy so it feels like an extension of your hand.
What “worth it” means by price tier
Under $75 models (Victorinox, Mercer) offer strong value for most home cooks. In the $100–$250 range, you get harder alloys, better finish, and tighter QC—worth it if you cook often and will maintain the edge. Let fit and expected use guide your price decision.
- Tip: prioritize fit, then material, then price.
- Outcome: the right 8-inch chef gives consistent slices, safer control, and easier upkeep.
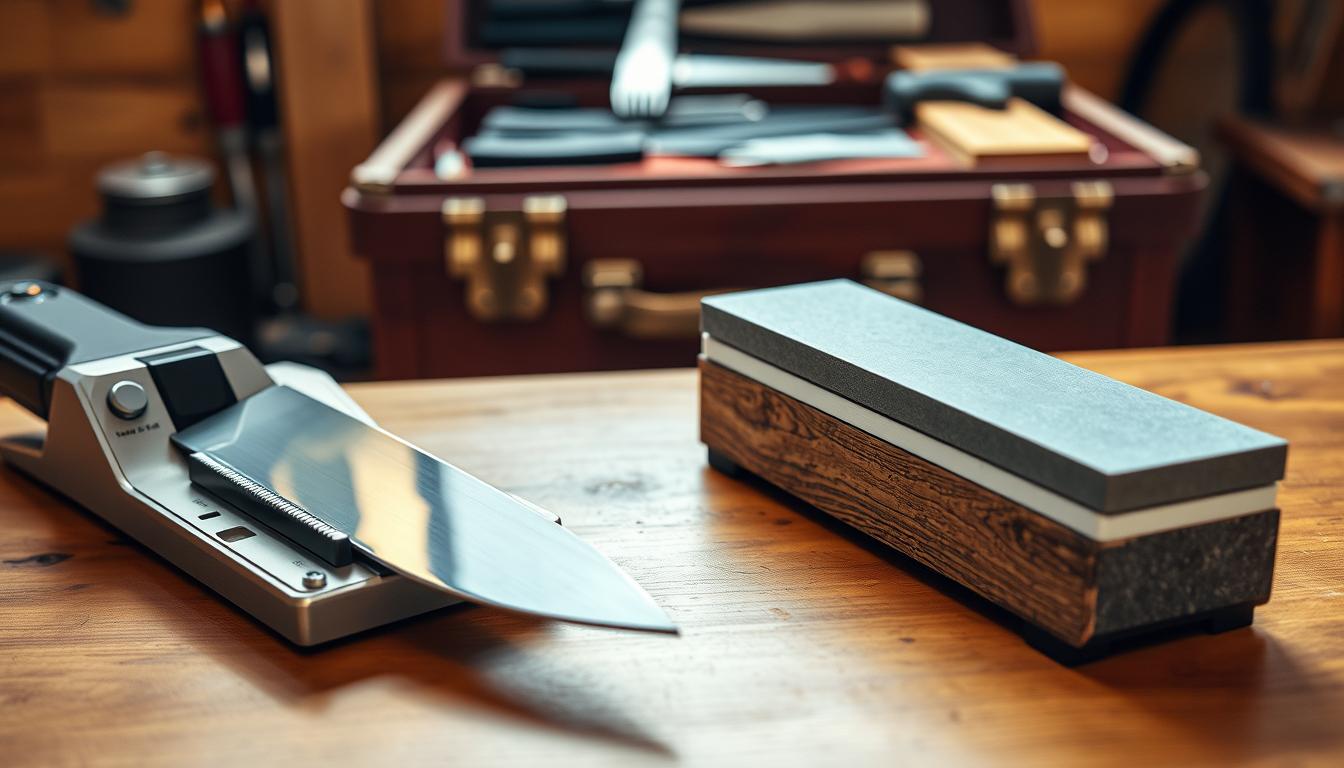
How to keep your knife sharp between tests
A short maintenance habit saves you time and keeps the edge performing. Follow a simple cycle so your paper, tomato, or hair checks stay meaningful over time.
Honing vs. sharpening: what each does
Honing realigns a rolled edge and restores cutting feel without removing much metal. Use a honing steel between full sessions to keep the edge straight.
Sharpening removes material to rebuild the bevel. When chips, persistent snags, or dullness appear, sharpen rather than hone.
Care habits that protect sharpness
Hand-wash and dry every time. Don’t soak blades or leave them wet; harder steel can rust or stain faster if neglected.
- Store with a guard, in a block, or on a strip to protect the blade and the edge.
- Avoid dishwashers and harsh detergents that harm metal and wood handles.
- Dry hands and handle surfaces before use for safer grip and control.
Red flags to fix early
Watch for tiny chips, rust spots, or uneven edges. These issues grow with time and can make slicing onions or chicken harder and less safe.
Fix small problems promptly: a light sharpen removes chips; rust needs cleaning and drying to stop spread.
Conclusion
Close each session with a short, predictable sequence to track edge health and avoid surprises.
Start with a paper slice, confirm with a tomato, and use an onion or real prep cut as a tie-breaker. These quick steps show how your knife and blade behave in actual tasks.
If a cut snags across more than one test, don’t force it. Hone for a quick fix or sharpen to reset the edge so cutting stays safe and fast.
Match the tool to your needs: choose a durable workhorse for heavy use, a precision model for delicate slices, or a value option for reliable daily service. For direction: Wüsthof for all-around work, Shun Classic as an upgrade, and Victorinox for value.
Retest weekly. Small checks save time, keep sharpness steady, and make prep smoother—one short test at a time.