How to Sharpen a Kitchen Knife with a Whetstone: A Beginner’s Guide
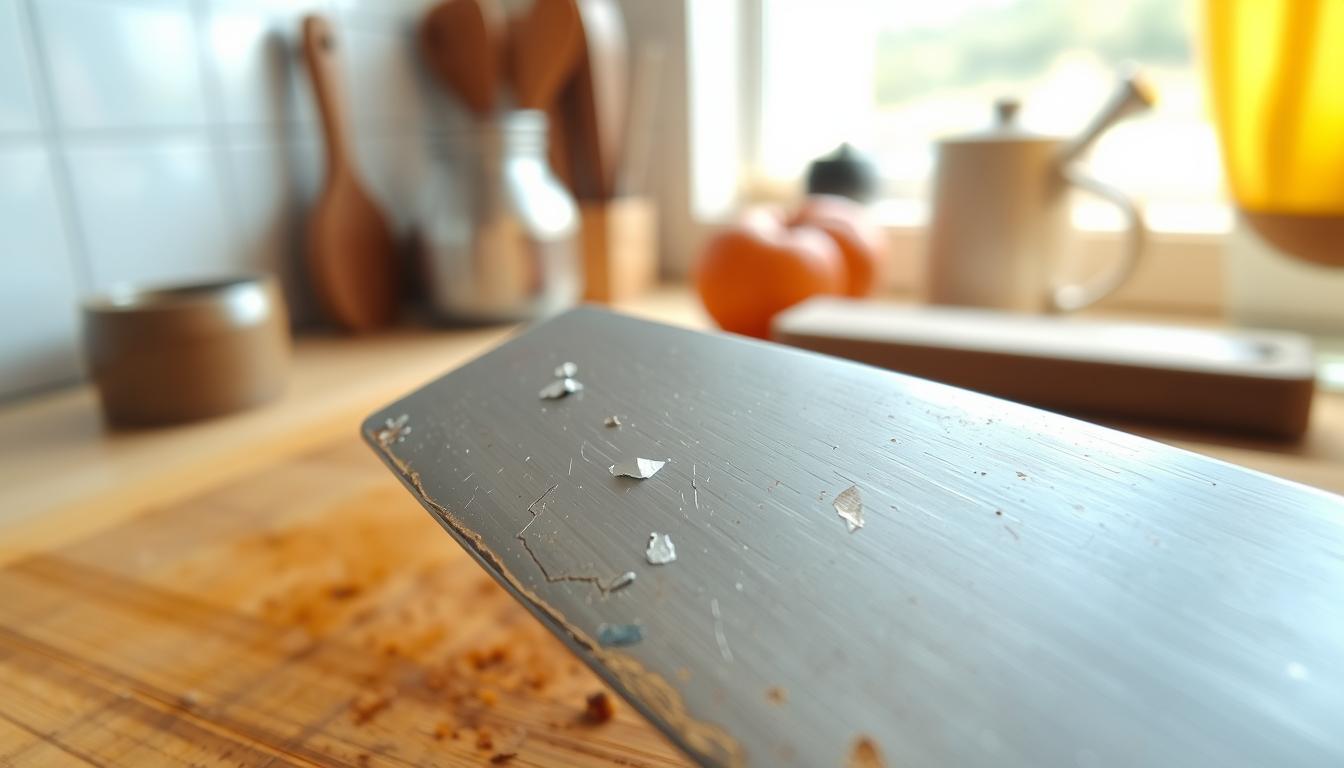
Whetstone sharpening is an affordable, long-lasting way to keep your kitchen knife working great. You will learn a simple method that reduces rust, chips, and fast wear. This guide explains what to expect and why the work pays off.
Start by knowing you remove small amounts of metal to rebuild a clean cutting edge. Consistency matters more than speed. A sharp blade means a controlled cut that bites into food and often feels safer than a dull one.
For most home cooks, aim for about a 15–20° angle for balance between sharpness and durability. You will set up a stable station, pick the right grit, wet the stone, work to raise a burr, then refine on higher grit and test the edge.
Two keys you’ll return to: hold a steady angle and sharpen until you can feel a burr before moving on. Avoid rushing, changing the angle mid-stroke, or skipping burr removal—these common mistakes ruin results.
Key takeaways: learn the step-by-step method, keep a steady angle, confirm a burr, and aim for 15–20° as your starting blade angle.
Set Up Your Sharpening Station at Home
Set up a stable workspace so your blade work feels safe and predictable. Choose a flat surface with room to move from the heel to the tip without bumping anything. Stability protects your angle and keeps each stroke controlled.

Make a simple anti-slip base: lay a damp dishcloth, place a board on top, then set the stone so it stays planted while you work. This keeps the stone steady and prevents slips that change your edge angle.
- Core items: your knife, one or two stones, a dish or container for water, and a towel.
- Optional helpers: a marker and an angle guide or small knife sharpener accessory to repeat the same angle.
- Keep water nearby so you can re-wet the stone as it starts to dry.
Safety reminders: keep your off-hand fingers above the edge, wipe any spills, and work slowly until your motions feel controlled. A tidy station at home makes learning faster and safer.
Choose the Right Whetstone Grit for Your Knife
Pick the right grit and you control how fast metal comes off and how smooth the final edge feels. Grit works like sandpaper: low numbers remove material quickly, high numbers refine and polish.

Coarse, medium, fine, and polishing — what each does
Coarse stones (~120–600) reshape a damaged or very blunt blade and fix chips fast. Medium grits (~800–2000) are the all-purpose range; around 1000 is a common starter for dull knives.
Fine grits (~3000–5000) smooth the edge for clean kitchen cuts. Polishing grits (6000+) add extra refinement but give smaller gains for most home use.
Starter progression and two-sided stones
A simple plan for most home cooks: start at about 1000 grit and work up to 6000 if you want a sharper, refined edge. Use coarse only when the blade is chipped or very dull.
- Why side matters: many whetstones are two-sided with different grits per side.
- Use the coarse side to remove metal and the fine side to finish.
- Expect coarse work to feel faster and rougher; finer sides feel smooth and take more strokes.
Prep Your Whetstone: Water, Soaking, and Slurry
Proper wet prep sets the stage for every effective edge. The exact steps you follow depend on the type of stone you own. Read the maker’s directions the first time you use whetstone gear so you don’t guess.
Soaking stones vs splash-and-go stones
Some stones require full soaking. Submerge them until bubbles stop rising. That pause is a simple cue that the stone has absorbed enough water. This can take from a few minutes up to thirty minutes depending on the stone.
Other stones are splash-and-go. You only need to flood the surface lightly. If the surface looks dry while you work, reapply water.
Keep the surface wet to build slurry
Slurry is water mixed with stone particles. It increases abrasion and speeds results during sharpening. Keep a small cup of water at hand and wet the surface when it looks dull or dry.
- Do: follow manufacturer advice, wet until bubbles stop, and manage water during the process.
- Don’t: use a dry stone or store a soaked stone while still wet—let it dry fully first.
- Result: steady water control makes the process smoother and helps you hold a consistent angle.
Whetstone Sharpening Basics: Angle, Pressure, and Strokes
Control of angle, pressure, and the number of strokes is what makes a clean, repeatable edge. These three factors determine how the metal wears and how well your knives perform in the kitchen.
Find the right angle for most kitchen knives
For general kitchen use, aim for about 15–20°. That range balances sharpness and durability for everyday tasks.
Below 15° can cut extremely well but chips more easily. If you work near bones or tough gristle, raise the angle toward 20–25° for better durability.
Keep a steady angle with a guide or the marker trick
Use an angle guide to hold the blade steady if you struggle to keep the same tilt. The marker trick is a simple visual check: ink the bevel, make a few strokes, and see where the ink wears off.
Hands, pressure, and strokes
Place your dominant hand on the handle and rest the fingertips of the other hand on the flat of the blade just above the edge. Never press on the edge itself.
Start with firm, controlled pressure on lower grit, then lighten pressure as you move to finer grits. Treat strokes like reps: repeat the same number per side to match bevels and build consistency.
- Why consistency matters: a steady angle creates an even bevel; shifting it rounds the edge.
- Easy checks: count strokes, use the guide, or try the marker trick to verify contact.
- Basic rule: steady angle + controlled pressure + even strokes = a reliable cutting edge.
Sharpen Your Knife on the Stone Until You Raise a Burr
Work patiently on the coarse side until you feel a faint wire along the opposite face of the edge. Start on the lower grit because it does the heavy work of shaping the bevel before you refine it on finer grits.
Work heel to tip and pick a stroke style
Use long, smooth strokes from the heel to the tip so every part of the edge gets attention. Keep the same angle and steady pressure for each stroke.
Choose a style that fits your skill: section-by-section strokes let you fix chips and problem spots. Full-length pull strokes give a more even bevel along the entire edge.
Detecting the burr and flipping sides
The burr is a tiny wire-like lip of metal on the opposite side of the edge. You will often feel it more than see it. Check gently with a fingertip away from the very edge to avoid cuts.
Only flip sides once the burr runs along the full length from heel to tip. Then repeat roughly the same number of strokes on the other side to keep the bevel centered and even.
Common beginner mistakes
- Changing the angle mid-stroke — this rounds the edge.
- Rushing the process or doing tiny amounts per side before a burr forms.
- Using inconsistent pressure — keep it steady until you move to finer grits.
Tip: The burr is your progress signal. Without it, you risk polishing the shoulder instead of removing the right amount of metal to truly sharpen knife edges.
Refine, Hone, and Test Sharpness
After you form the bevel, move up to finer grits to polish the edge and improve cutting performance. Keep the same angle, lighten pressure, and focus on refinement rather than metal removal.
Move up in grit to refine the edge
Step progressively to higher grits (for example up to 6000) to make the edge cleaner and more consistent. On finer stone you will often use more strokes and more time to see gains.
Remove the burr so the knife will cut well
The burr must come off or the blade can feel sharp but fail when cutting. Use light, alternating strokes on each side to collapse that wire edge.
- Options: a ceramic honing rod — about 5–6 controlled passes per side for coarse/medium work.
- Deburr on scrap wood by dragging the edge gently along the grain once the burr appears.
- On very fine grits, skip the rod and remove the burr by alternating light strokes on the stone.
Simple tests and maintenance rhythm
Check sharpness by slicing a sheet of paper; a clean bite means the edge is slicing, not tearing. Repeat the process on both sides if the cut looks ragged.
With normal home use, plan touch-ups every couple of months. Heavy cooks may need more frequent care to keep blades performing their best.
Conclusion
Wrap up the process with a short mental checklist you can follow every time. Stable surface, right grit, prep the stone, hold a steady angle, sharpen until a burr forms, flip and match strokes, refine on higher grit, then deburr and test.
Results come from consistency, not force. Slow, even strokes and the same angle make your knives cut cleaner and last longer.
For routine kitchen use, start with one medium grit stone and add finer whetstones when you want more polish. Use a coarse stone only for damage.
Finish with proper care: rinse slurry, dry fully before storage, and flatten the stone when it dishes. That maintenance keeps the process effective and protects your tools.