Why You Need a Nakiri: The Ultimate Japanese Vegetable Cleaver
Think of the nakiri as a vegetable-first tool that can change how you prep produce in your kitchen. If you chop vegetables daily, this blade speeds tasks and gives cleaner cuts with less tearing.
This buyer’s guide shows what a nakiri is, why it slices so cleanly, and how to choose steel, handle, and geometry. You’ll also learn what not to cut to avoid damage.
We’ll help you pick the best nakiri for your budget and cooking style, not just describe shape. Key choices you’ll later unpack include blade length, weight and balance, double-bevel edge, and steel type.
Framed as a vegetable cleaver, this tool is not for bones or heavy chopping. For U.S. home cooks who want faster prep, neater cuts, and fewer frustrating partial slices, this guide helps you make the right purchase and use it well.
What a Nakiri Knife Is and Why It Belongs in Your Kitchen
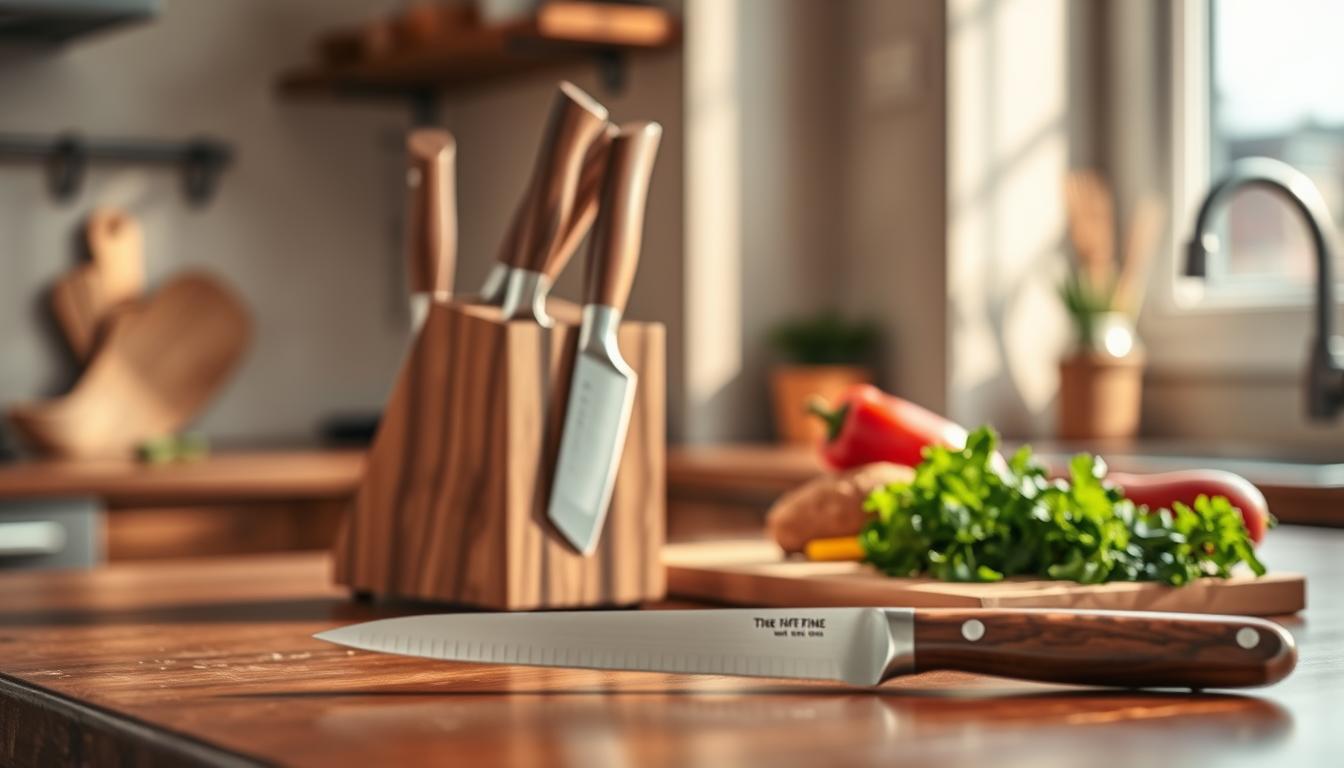
Think of the nakiri as a purpose-built slicer for produce and delicate ingredients. Its name literally means “leaf cutter” (nakiri bōchō), and that history shows in how it handles home‑kitchen work in Japan: efficient, precise, and gentle on soft flesh.

The signature shape is simple: a tall, rectangular blade with a mostly straight edge and a rounded or squared tip. That flat profile lets you cut straight down and keep the entire blade in contact with the board. The tall blade also gives knuckle clearance and makes scooping chopped vegetables easy.
Compared with a chef knife, this tool is more specialized. It’s easier to use than single‑bevel traditional tools, yet it still fits modern kitchen lineups. You’ll find nakiri knives excel at herbs, fruit, tofu, and portioning boneless proteins. Specialization is the point—it shines on vegetables and nearby tasks but isn’t meant for heavy bone or large meat work.
- Rectangular profile for straight-down prep
- Flat edge and tall blade for consistent contact
- Good for herbs, fruit, tofu, and small boneless cuts
What Makes a Nakiri So Good at Cutting Vegetables
When you switch to a straight-edged blade, your hands adopt a push-chop motion that keeps the full edge on the cutting board. That motion uses the entire cutting surface at once, so each slice separates cleanly instead of leaving pieces partially attached.

Straight edge + push-chop motion
With a mostly straight edge you push and chop rather than rock. The full edge meets the cutting board, so you get full separation on every pass.
Cleaner slices — fewer “veggie harmonicas”
Full contact means cleaner cuts. You avoid slices that fold or stay connected at the base, which saves time and reduces waste.
Thin blade geometry preserves texture
Thin, flat blades wedge less and crush less. That reduces cell damage and slows enzymatic browning, so flavors and textures stay true.
Knuckle clearance and safer, faster work
The tall blade profile gives knuckle room so your guiding hand stays safer. That clearance helps you move quicker with better control over each cut.
- Performance you can see: cleaner cuts and better presentation.
- Sharpness matters: a true edge preserves juices and speeds prep time.
- Ergonomics: blade height improves safety and hand positioning.
Choosing a Nakiri knife: The Buyer’s Checklist That Actually Matters
Choosing a Nakiri knife starts with fit and control, not marketing specs. Use this short checklist to compare real-world feel, edge maintenance, and how the blade performs on your cutting board.
Blade length: 165–180 mm is the sweet spot
For most U.S. kitchens, 165–180 mm gives enough edge for cabbage and onions while staying nimble for daily prep. This length balances reach and precision so you can slice large heads without losing control.
Blade height and profile for scooping
Taller blades make scooping and transfer easier. More height also protects knuckles and lets you push-chop with cleaner transfers from board to pan.
Weight and balance: feel before specs
Pick weight for how you cook. Slightly blade-forward balance powers chopping. Heavy builds can cause hand fatigue during long prep sessions.
Edge grind: double-bevel is the user-friendly default
Double-bevel edges track straight down without swerving and are easier to sharpen than single-bevel options. If you maintain your own tools, this grind gives consistent precision and long-term quality.
- Length: 165–180 mm
- Height: taller for scooping
- Weight: balanced for speed and less fatigue
- Edge: double-bevel for easy care
Blade Steel Options: Stainless Steel vs Carbon Steel vs Powder Steel
Steel choice has the biggest impact on how the blade holds an edge and how much care it demands. Below are the three common material families and what each gives you in real use.
Carbon steel: sharp feel and patina tradeoffs
Carbon steel delivers fast sharpness and easy resharpening. It can reach high hardness and gives a keen edge that many cooks prefer. Over time it forms a patina that protects the surface.
That benefit comes with higher rust risk. You must wipe and dry the blade after use, especially when you cut acidic food like tomatoes or onions.
Stainless options and why VG-10 is common
Stainless steel resists corrosion and suits low-fuss ownership. Alloys like VG-10 combine chromium for a protective film with good abrasion resistance and reliable sharpness in home kitchens.
Powder steels: premium edge retention
Powder metallurgy steels offer exceptional edge life and very high hardness potential. Expect superior retention, greater cost, and occasional tradeoffs in availability.
- Quick rule: choose stainless or powder for low maintenance.
- Choose carbon if you enjoy sharpening and accept patina care.
- Care tip: always dry the blade after acidic or wet food to slow oxidation.
Blade Construction and Finish: Monosteel, San-Mai, and Damascus
Construction governs more than looks; it defines how the blade behaves under your hand. When you shop, the terms monosteel and san‑mai tell you if the core metal is exposed or sandwiched for support.
Monosteel vs san-mai in buying terms
Monosteel means the entire piece is one metal. That gives direct feedback and often lighter weight. It also makes heat treat and steel choice the main drivers of edge life.
The feel and benefits of san-mai cladding
San‑mai has a hard core for sharpness and softer cladding for toughness. You feel a supportive mass behind the edge, which helps resist chips and adds durability during daily prep.
Damascus / suminagashi: style vs substance
Patterned Damascus or suminagashi is stunning, but the wavy finish mainly shows craftsmanship. The visible pattern does not improve cutting performance; geometry, heat treat, and core steel do.
- Practical rule: pick construction that matches your needs—durability and easy care for everyday use, or artistry if looks matter.
- Don’t overpay: prioritize edge geometry and steel quality over decorative finish.
Handle Design and Ergonomics: Japanese vs Western Handles
Handle choice changes how the whole tool feels in your hand and how long you can prep before fatigue sets in.
Japanese handles are often lightweight and let you move faster during high-volume vegetable work. Their slim profiles favor control and precision, and many models use traditional wood for a natural, warm grip.
Western-style handles usually use full‑tang construction and include a bolster. That weight and mass feel familiar if you use chef knives. A solid build can feel secure, but some bolsters create hot spots near the pinch area.
How to check ergonomics
Test pinch grip comfort first. Hold the blade where the spine meets the handle; your hand should rest without pressure points.
Check whether the bolster digs into your fingers when you rock or push. Also try wet grips to confirm slip resistance.
- Balance and weight: light handles speed repetitive cuts; heavier builds add power but can tire you.
- Surface and wood finish: smooth, well‑finished wood reduces hot spots and improves long use.
- Try models like Shun Premier or TUO Osprey to feel the difference between polished bolsters and lighter Eastern handles.
In short, prioritize fit over brand. The right handle keeps your hand comfortable and your cuts precise for every prep session.
Nakiri vs Usuba vs Santoku vs Gyuto: Which Knife Fits Your Cooking?
Your cooking habits should drive which blade sits on your prep board most often. If vegetables dominate meals, prefer a profile built for straight cuts and full edge contact. If you do decorative work, single‑bevel tools reward practice with unmatched precision.
Double‑bevel ease vs single‑bevel precision
Double‑bevel models give easier sharpening and everyday use. Single‑bevel usuba tools serve chefs who do katsuramuki and fine decorative slices. Expect a learning curve and specialized maintenance with single‑bevel work.
Vegetable‑first vs all‑purpose
The vegetable profile excels at clean board contact for even slices. The santoku is the flexible all‑rounder for meat, fish, and veg. If your menu mixes proteins and produce, the all‑purpose option reduces the number of blades you need.
When gyuto or sujihiki wins
For large cuts, slicing proteins, or work needing a pointed tip and longer reach, pick a gyuto or sujihiki. Those designs handle meat and long pulls that the vegetable‑focused profile shouldn’t be asked to do.
- Match use to daily meals to avoid overspending.
- Double‑bevel for ease; single‑bevel for specialty precision.
- Keep a gyuto/sujihiki if you carve large proteins often.
Picking the Right Nakiri Size and Shape for Your Cutting Style
Small shifts in length and edge geometry change how the blade feels and how fast you work. Decide by how you prep, your board size, and how much room your hand needs.
Regional shape cues to watch for
Kanto-style models often have a shorter handle and a rounded heel that eases rocking movements and tight turns.
Western Japan versions favor a squared or pointy heel that gives more board contact near the rear of the blade.
Kyoto patterns sometimes show a slight curve at the tip, adding a touch of slicing action to push-chop work.
How tip design alters your prep and safety
The typical non-pointed tip shifts your use toward the front edge and flat motion. You rely less on piercing and more on steady push-chopping.
That lack of a sharp point improves safety—fewer accidental pokes and a predictable guiding-hand position under the tall blade.
- Shape affects how the blade tracks and how the hand sits on the handle.
- Pick shorter lengths for small boards and tight kitchens.
- A flatter profile rewards consistent push-chop motion and saves time once you adapt.
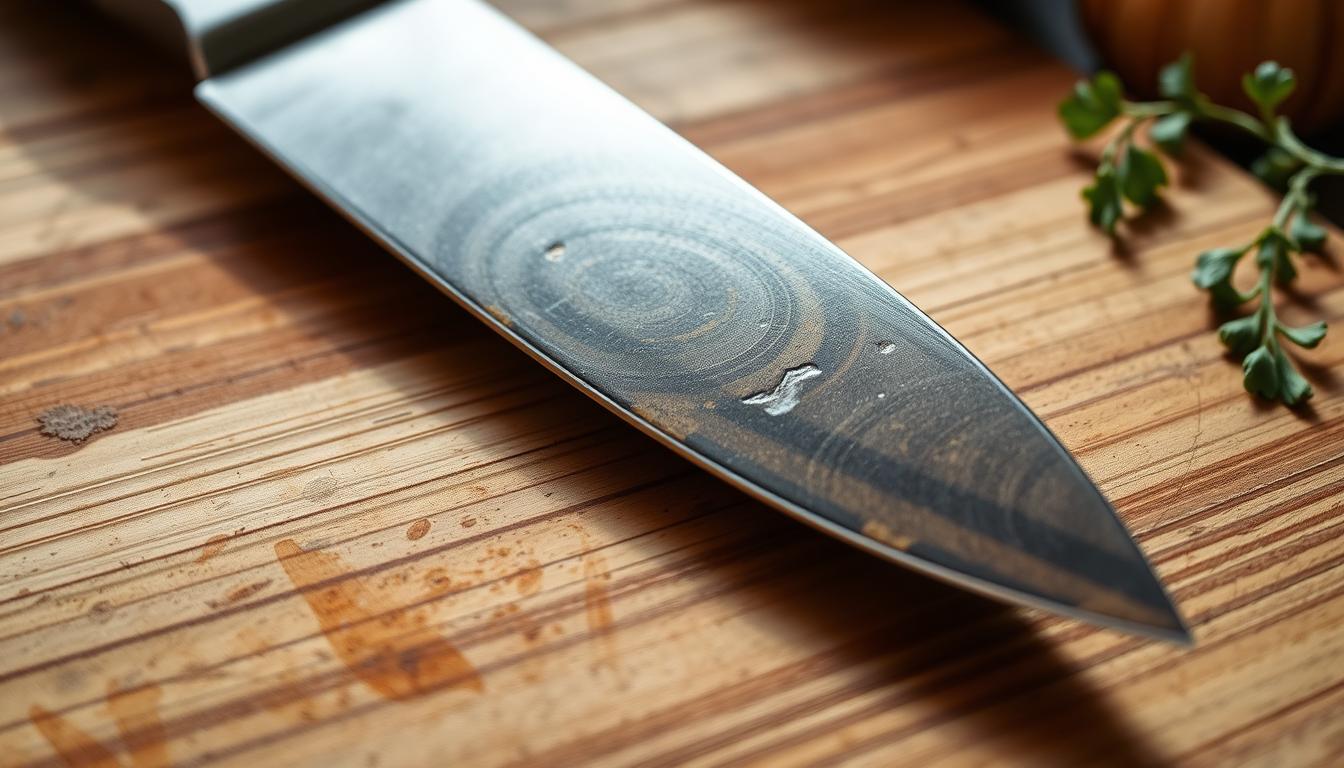
What Not to Cut with a Nakiri (and Why It Can Chip)
Thin Japanese blades excel at precise vegetable work, but they have clear limits you should know. Pushing the geometry past those limits risks chips, faster dulling, and costly sharpening.
Hard vegetables and heavy-duty jobs
Very hard vegetables like pumpkins or dense squash put huge stress on a thin blade. The narrow edge can chip when it meets tough fiber or hard rinds.
If you need heavy-duty force, pick a sturdy cleaver or butcher-style tool designed for that work. That protects the fine edge and preserves performance for daily prep.
Bones, frozen food, pits, and shells — the “don’t bite it” rule
Don’t cut anything you wouldn’t bite with your own teeth. Bones, frozen blocks, large pits, and shells transmit shock straight into the edge and cause micro-chips.
Simple rule: if it’s harder than raw carrot, use something tougher. This saves you time and money by avoiding avoidable damage.
Why bread crust and twisting cuts are a bad match
Crunchy crust plus sawing or twisting can split and stress fine Japanese edges. Thin blades can also crush soft crumb when you saw rather than slice cleanly.
Use a bread knife or Japanese pankiri for loaves. For hard veg or bones, use a cleaver. Keeping each tool to its intended use improves results and prolongs the blade’s life.
- Protect your investment: follow the “don’t bite it” rule.
- Alternatives: cleaver for heavy work, bread knife for loaves.
- Keep the nakiri for: clean, repeatable vegetable cutting and prep.
How to Use a Nakiri for Cleaner Cuts and Faster Prep
A short, reliable technique transforms how you slice, dice, and move ingredients from board to pan. With a straight edge, you rely on a push‑chop motion that keeps the full edge in contact with the cutting board for predictable, clean cuts.
Push‑chopping for consistent slicing and chopping
Lift, move forward slightly, and press straight down so the edge lands flat. Repeat with steady rhythm; don’t saw or twist. This motion preserves the edge and speeds work.
Use the full edge for even dice
Instead of hunting for a belly, slide the entire blade through the ingredient. That gives uniform slices and predictable cuts for onions, carrots, cabbage, and delicate herbs.
Make the blade face a workflow tool
The wide face acts like a paddle. After chopping, scoop and transfer food directly to a bowl or pan. This saves time and keeps your prep area tidy.
- Safety tip: let the edge do the work—keep the blade path vertical and avoid twisting.
- Result: cleaner cuts, even cooking, and better presentation for salads, stir‑fries, and garnishes.
Maintenance and Sharpening: Keep Your Edge Performing Like New
A little routine care protects your blade and saves sharpening time. Wash, wipe, and dry promptly, especially after cutting acidic produce, to protect steel and preserve sharpness.
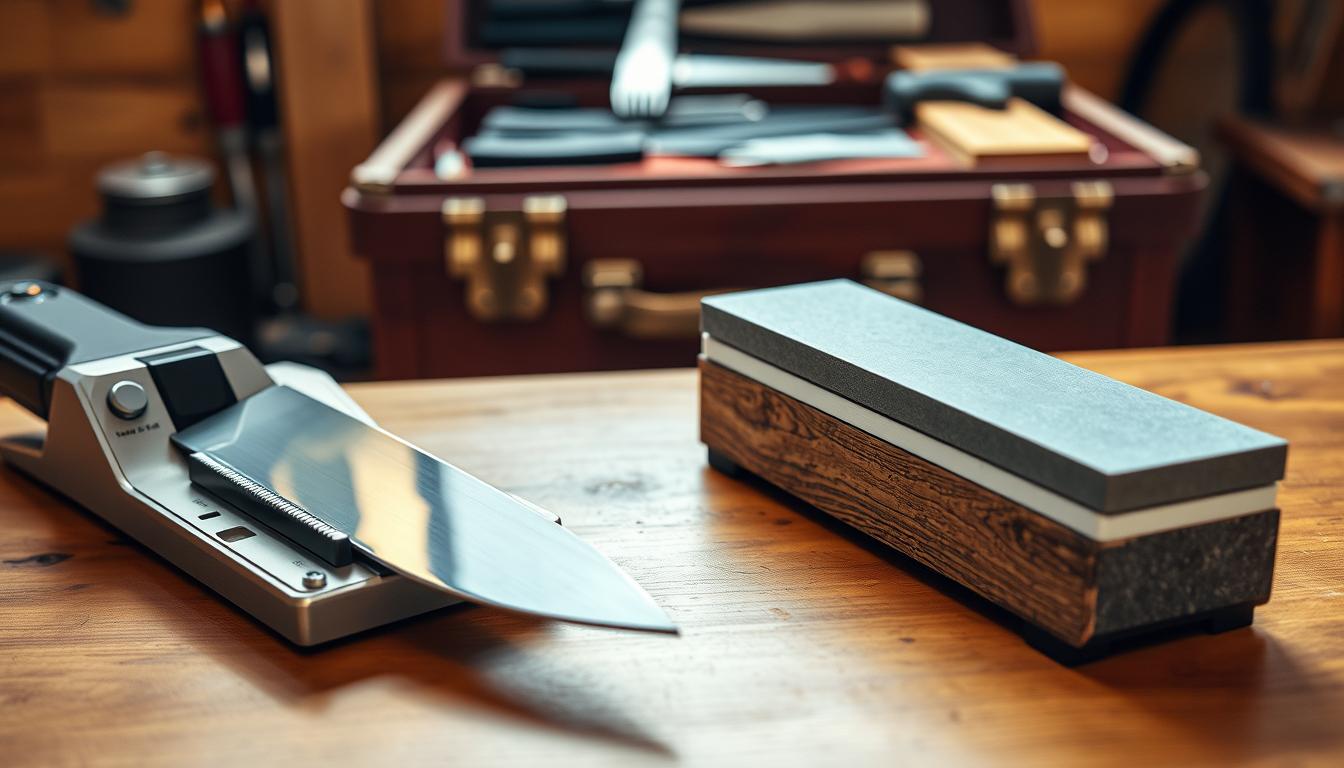
Whetstone basics for home sharpening
For home use, a 1000/3000 grit whetstone setup works well. Use 1000 grit to reprofile and remove dings. Follow with 3000 grit to refine the edge for clean vegetable cutting.
Avoid low spots on straight edges
With a straight edge, uneven pressure creates low spots that break full board contact. Keep strokes even, check the whole length, and stop if you feel a hollow section.
Tools to avoid and honing tips
Avoid pull-through and electric sharpeners. They remove too much material and can heat the steel, harming geometry. If you use a honing rod, favor ceramic for light touch-ups. Poor technique can still chip a hard edge, so practice gently.
- Daily: wash, dry, and store safely to protect steel.
- Sharpening: 1000 grit then 3000 grit for most home users.
- Avoid: pull-through and electric devices that damage knives.
Skill matters: if you want low-effort upkeep, pick steels and finishes that match your willingness to maintain them. With simple care, your cutting experience will stay sharp and consistent.
Conclusion
If you want uniform slices and less time at the board, a nakiri delivers faster vegetable prep, cleaner cuts, and a safer push‑chop workflow you’ll use every week.
Focus on what matters: pick the right steel for your maintenance level, prefer a double‑bevel edge for easier care, and test the handle for comfort. Match weight and balance to your speed, and choose length and shape that fit your board space.
Remember limits: don’t force bones, frozen blocks, very hard squash, or crusty bread—those harms reduce long‑term performance. Treat this model as a specialist that complements your gyuto or sujihiki for meat and fish, not as the only knife used in the kitchen.